Every summer, my grandma’s garden would overflow with green beans—more than we could possibly eat fresh. That’s when she’d pull out her big enamel pot and whip up batch after batch of what she called “dilly beans.” The crisp-tangy bite of those refrigerator pickles became my favorite snack by the end of July. I’d sneak into the fridge just to fish one out of the jar with my fingers! Now I make them every year when the beans are at their peak. These refrigerator dilly beans are the easiest way to preserve that fresh garden crunch without any fancy canning equipment. Just a few simple ingredients and a day’s patience—trust me, they’re worth the wait.
Why You’ll Love These Refrigerator Dilly Beans
Oh, where do I start? These pickled green beans are the ultimate lazy cook’s dream—no boiling water baths or fussy sterilizing. You get all that bright, tangy crunch without breaking a sweat. Here’s what makes them magic:
- Speed demon: Ready to eat in just 24 hours (if you can resist sneaking one sooner!)
- No canning phobia: Skip the pressure cooker—your fridge does all the preserving work
- Flavor fireworks: Garlic and dill seed pack a punch, while red pepper flakes let you dial up the heat
- Crisp guarantee: Unlike shelf-stable pickles, these stay snappy for months
Seriously, once you taste that first cold, garlicky bean straight from the jar, you’ll wonder why you ever bought store-bought pickles.
Ingredients for Refrigerator Dilly Beans
Here’s what you’ll need to make these addictive little pickled green beans—and trust me, you probably have most of this already! The magic is in the simple-but-mighty combo:
- 1 pound fresh green beans – Look for firm, bright ones (no floppy beans allowed!) and trim off those stem ends
- 2 cups white vinegar – The sharp backbone of our brine—don’t sub apple cider vinegar unless you want a fruitier tang
- 2 cups water – Just plain ol’ tap water works fine here
- 2 tablespoons pickling salt – Important: Use actual pickling salt—table salt has additives that’ll make your brine cloudy
- 4 cloves garlic – Peeled and lightly smashed (I whack ‘em with my knife—very therapeutic)
- 1 teaspoon red pepper flakes – Adjust up or down depending on your heat tolerance
- 1 tablespoon dill seed – That distinctive “dilly” flavor punch in every bite
See? Nothing fancy—just honest ingredients ready to work some pickle magic in your fridge!
Equipment You’ll Need
Grab these basics—I bet you’ve got most of them clattering around your kitchen already:
- Large pot: For boiling that zippy brine
- Clean jars with lids: Pint-sized mason jars are perfect (no need to sterilize—we’re fridge pickling!)
- Measuring cups: Eyeballing vinegar amounts leads to pickle regret
That’s it! No fancy gadgets required—just like Grandma used to do it.
How to Make Refrigerator Dilly Beans
Okay, let’s get down to pickle business! This is where the magic happens—and I promise, it’s easier than you think. Just follow these steps, and you’ll have jars of crunchy, tangy goodness in no time.
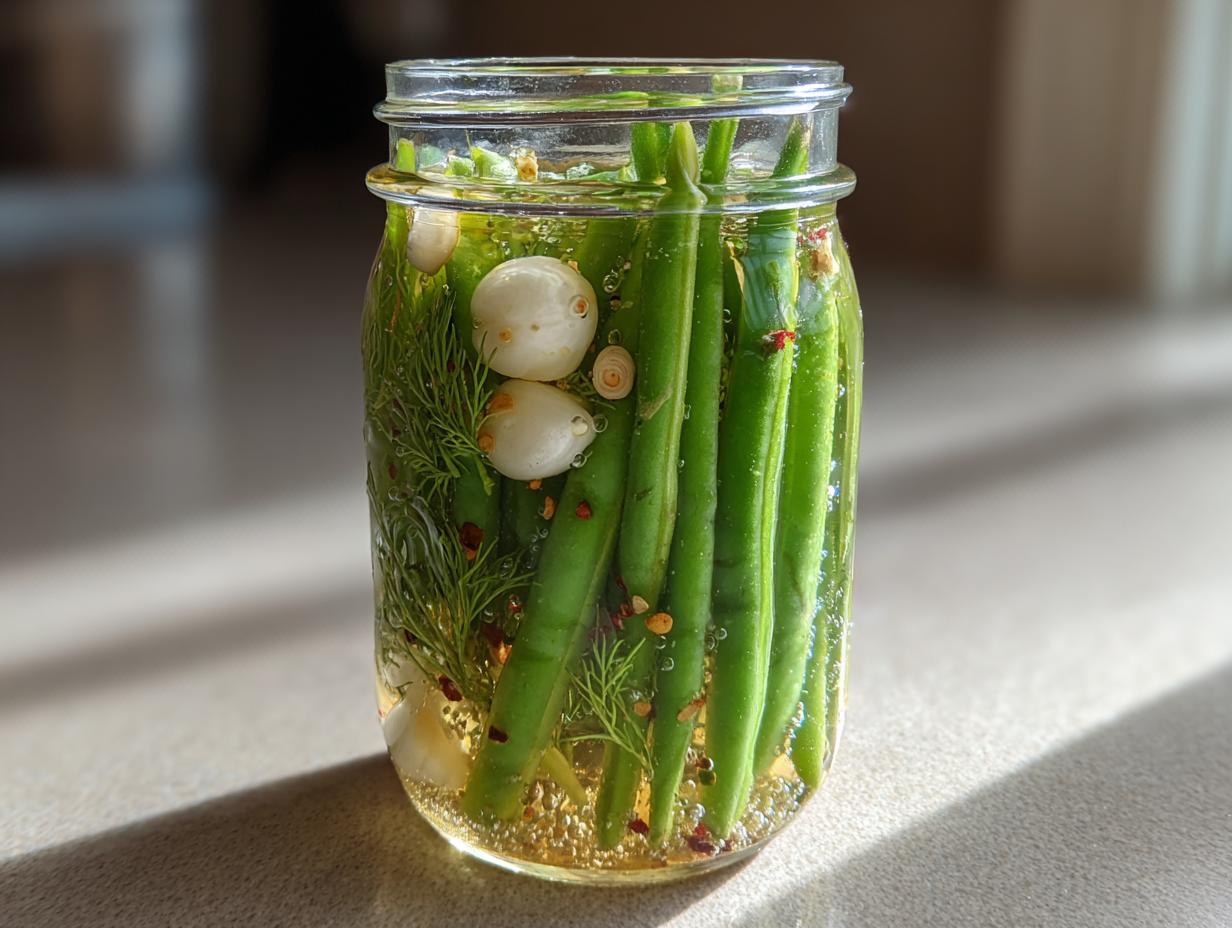
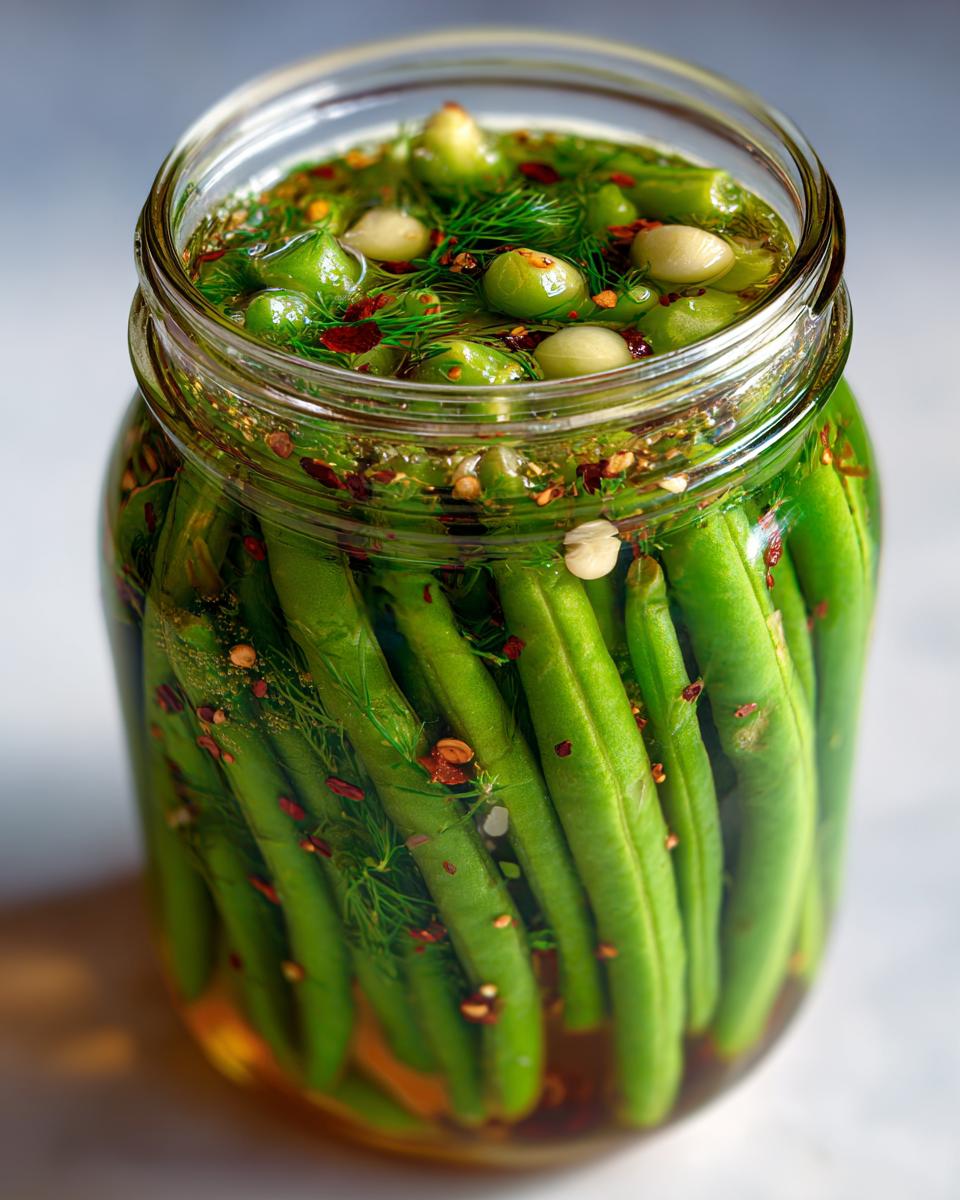
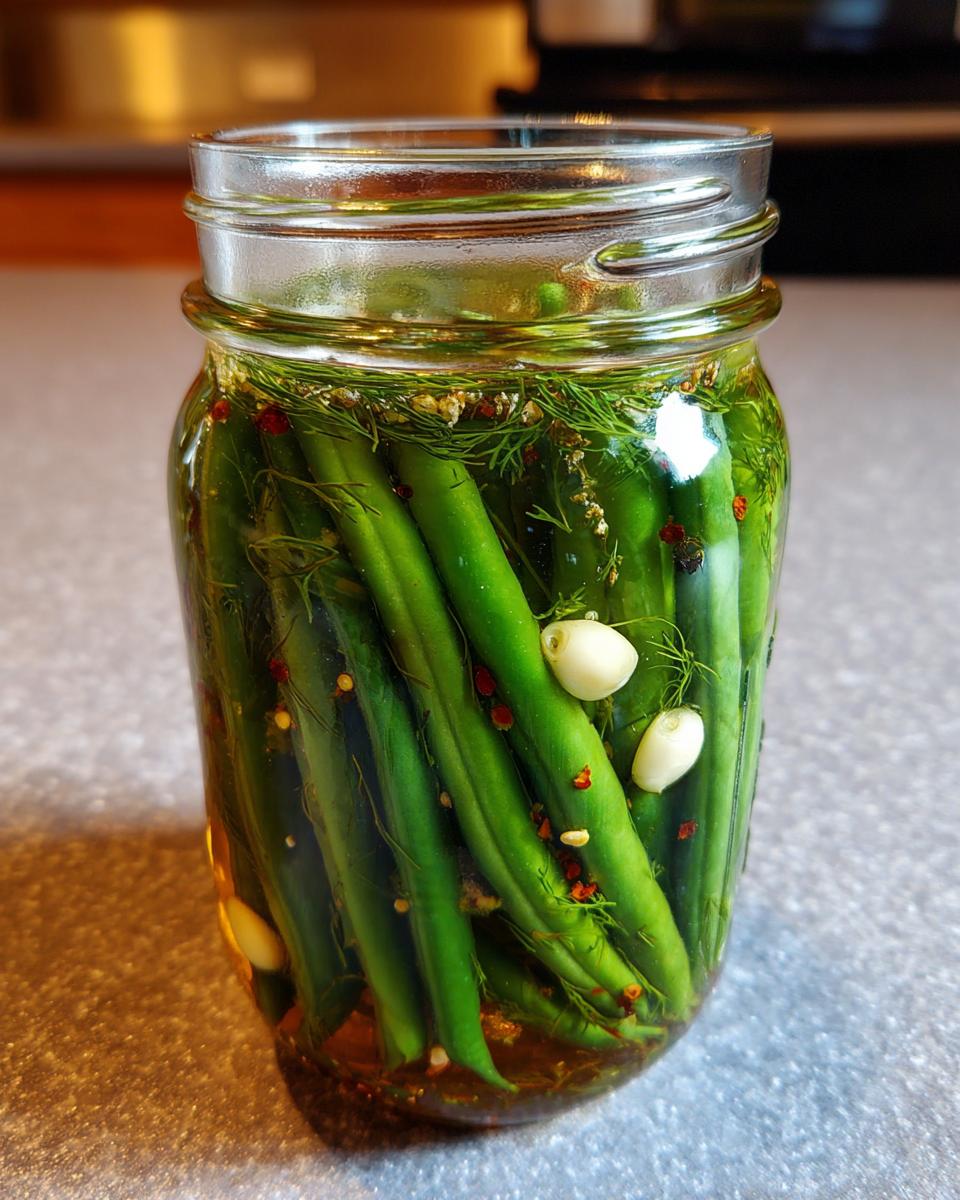
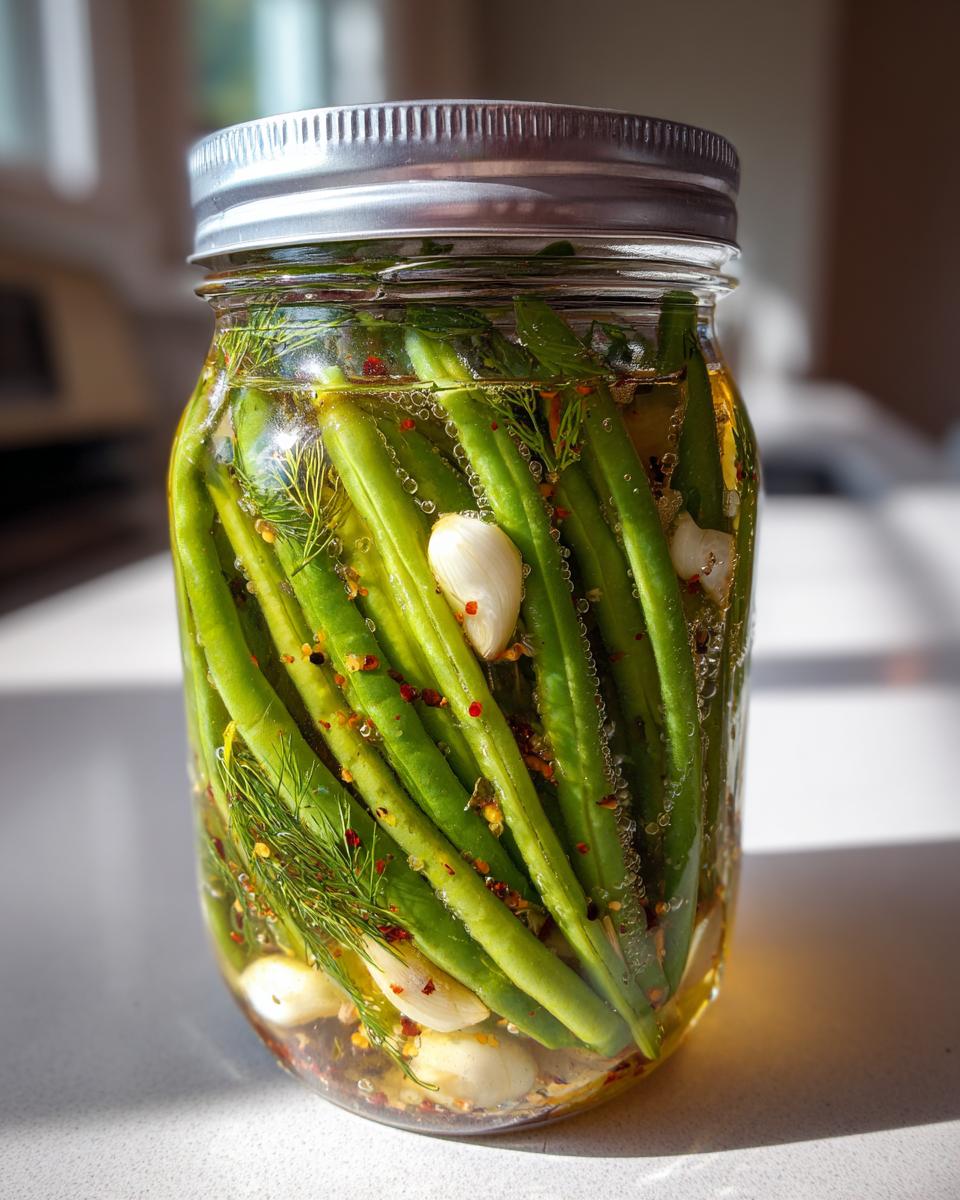
- Prep those beans: First, give your green beans a good rinse and trim off the stem ends. I like to leave them whole for that classic “dilly bean” look, but you can snap them in half if your jars are short.
- Bring on the brine: In your pot, combine the vinegar, water, and pickling salt. Crank up the heat until it hits a rolling boil—that sharp vinegar smell means it’s working!
- Pack ‘em tight: Stuff your clean jars with the green beans standing upright (they’ll fit more this way). Tuck in the garlic cloves, then sprinkle the red pepper flakes and dill seed evenly between jars.
- Hot brine time: Carefully pour the boiling liquid over the beans, leaving about ½ inch of space at the top. Don’t skip this headspace! The beans need room to soak up all that flavor.
- Seal and surrender: Pop the lids on, let them cool to room temperature (patience, grasshopper!), then tuck them in the fridge. Walk away for at least 24 hours—I know it’s hard, but that waiting time turns good beans into great pickles!
Pro tip: Resist the urge to invert the jars like old-school canning. These are refrigerator pickles—just seal ‘em and chill ‘em. That cooling step is crucial for texture and safety, so don’t rush it!
Tips for Perfect Refrigerator Dilly Beans
After making these for years (and yes, learning from a few pickle fails), here’s what I’ve figured out:
- Bean quality matters: Mushy beans make mushy pickles—only use the crispest, freshest green beans you can find
- Heat control: That teaspoon of red pepper flakes? Start with half if you’re spice-shy—you can always add more next batch
- The great brine shake: Gently tilt jars upside-down after cooling to redistribute spices (no shaking—that bruises the beans!)
- Lid check: If your jar doesn’t “pop” when opened after 24 hours, your seal wasn’t tight enough—still safe, but eat those first
Oh—and label your jars! Nothing’s sadder than mystery pickles lost in the fridge abyss.
Variations for Refrigerator Dilly Beans
Once you’ve mastered the basic recipe, it’s time to play pickle scientist! Here are my favorite ways to mix things up:
- Mustard magic: Toss in ½ teaspoon yellow mustard seeds per jar—they add a subtle pop and gorgeous speckles
- Vinegar swap: Try apple cider vinegar for a mellower tang (just know it’ll darken your beans)
- Fresh dill delight: Replace dill seed with 2-3 sprigs of fresh dill per jar—the flavor’s brighter but fades faster
- Sweet heat: Stir 1 tablespoon sugar into the brine for a sweet-and-spicy twist
The best part? You can customize every jar differently—my family fights over whose combo is best!
Serving Suggestions
These crunchy dilly beans are way more than just a fridge snack—they’re secret weapons for all sorts of dishes! My favorite ways to show them off:
- Charcuterie star: Toss them on a cheese board—the tang cuts through rich meats and creamy brie perfectly
- Bloody Mary bling: Skip the boring celery stick and garnish with a whole dilly bean (it’s edible art!)
- Grill master’s side: Serve alongside smoky ribs or grilled chicken—those cold, crisp beans balance the heat
Honestly? I’ve even chopped them into potato salad when I’m feeling fancy. No wrong way to eat ‘em!
Storing Your Refrigerator Dilly Beans
Here’s the beautiful part—these pickled green beans only get better with time! Tuck them in the back of your fridge (where I swear the pickle magic happens), and they’ll stay crisp and flavorful for up to 3 months. Pro tip from my many pickle experiments: slap a date label on those jars. You’ll thank yourself later when you’re debating between “June’s spicy batch” and “August’s extra-garlicky ones.” And if you see any cloudy brine after a few weeks? Don’t panic—it’s just the garlic doing its thing. Still totally safe to crunch away!
Nutritional Information
Now, let’s talk numbers—but remember, these are estimates! Your actual nutrition may vary depending on bean size and how much brine you slurp up (we’ve all done it). Per ¼ cup serving:
- Calories: 30
- Carbs: 6g (2g fiber)
- Sodium: 300mg
- Sugar: 1g
Zero fat, zero cholesterol—basically guilt-free pickle perfection! But let’s be real—you’re here for the crunch, not the calorie count.
Frequently Asked Questions
I’ve gotten so many questions about these dilly beans over the years—here are the ones that pop up most often:
Q1. How long until the beans are fully pickled?
The wait is the hardest part! At minimum, give them 24 hours in the fridge—that’s when the garlic and dill really start singing. But for maximum flavor? I prefer waiting 3 days. The brine works its magic slowly!
Q2. Can I reuse the leftover brine?
Tempting, but nope! That brine’s acidity decreases after the first use, which can affect food safety. However—here’s a fun trick—you can use a splash of leftover brine in salad dressings or Bloody Marys for instant flavor!
Q3. Why aren’t my beans staying crisp?
Oh no—floppy pickles are the worst! Either your beans weren’t fresh enough to start with, or the brine wasn’t boiling hot when poured. Always use firm, just-picked beans and piping hot brine to lock in that crunch.
Q4. Can I make these shelf-stable?
This particular recipe is for refrigerator pickles only—the vinegar ratio isn’t high enough for safe room-temperature storage. If you want to can them properly, you’ll need a tested water-bath recipe with more vinegar and processing time.
Share Your Feedback
Did your dilly beans turn out garlicky-perfect or fiery-hot? I’d love to hear your pickle adventures—drop a comment below and share your favorite twists! You can also find more inspiration on our Pinterest page.
Print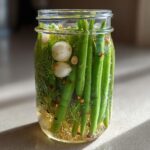
Spicy Refrigerator Dilly Beans Crunch in Just 24 Hours
- Prep Time: 15 minutes
- Cook Time: 10 minutes
- Total Time: 25 minutes
- Yield: 2 pints 1x
- Category: Side Dish
- Method: Pickling
- Cuisine: American
- Diet: Vegetarian
Description
A simple and tangy pickled green bean recipe that keeps well in the refrigerator.
Ingredients
- 1 pound fresh green beans, trimmed
- 2 cups white vinegar
- 2 cups water
- 2 tablespoons pickling salt
- 4 cloves garlic, peeled
- 1 teaspoon red pepper flakes
- 1 tablespoon dill seed
Instructions
- Wash and trim the green beans.
- Combine vinegar, water, and pickling salt in a pot. Bring to a boil.
- Pack the green beans into clean jars.
- Add garlic, red pepper flakes, and dill seed to each jar.
- Pour the hot brine over the beans, leaving 1/2 inch headspace.
- Seal the jars and let cool to room temperature.
- Refrigerate for at least 24 hours before eating.
Notes
- Use fresh, firm green beans.
- Adjust red pepper flakes for more or less heat.
- Keeps for up to 3 months in the refrigerator.
Nutrition
- Serving Size: 1/4 cup
- Calories: 30
- Sugar: 1g
- Sodium: 300mg
- Fat: 0g
- Saturated Fat: 0g
- Unsaturated Fat: 0g
- Trans Fat: 0g
- Carbohydrates: 6g
- Fiber: 2g
- Protein: 1g
- Cholesterol: 0mg