
Oh my gosh, you have to try these Classic Dilly Beans! I’ve been obsessed with pickling ever since my aunt handed me her handwritten recipe card – covered in vinegar stains and smelling faintly of garlic – during a summer visit years ago. There’s just something magical about transforming crisp green beans into these tangy, garlicky bites that make your taste buds sing.
What I love most is how simple Classic Dilly Beans are to make. No fancy canning equipment needed, just basic ingredients you probably already have in your pantry. That crisp-crunch texture? Absolute perfection. I keep jars in my fridge year-round because honestly, once you’ve had homemade, store-bought pickles just don’t compare. These are the ultimate snack straight from the jar, but trust me, they disappear fast when I put them out at parties too!
Why You’ll Love Classic Dilly Beans
Let me tell you why these pickled green beans will become your new obsession:
- That crunch! Fresh green beans keep their perfect snap even after pickling – no mushy veggies here
- So easy to make – just chop, boil brine, and pack jars (no complicated canning required!)
- Totally customizable spice level – add more red pepper flakes if you like heat, or skip them entirely
- The perfect grab-and-go snack when you need something tart and crunchy
- Makes your kitchen smell amazing with garlic and dill while they pickle
Seriously, once you try homemade Classic Dilly Beans, you’ll wonder how you ever settled for store-bought pickles. They’re that good!
Ingredients for Classic Dilly Beans
Here’s everything you’ll need to make these addictive pickled beans – and yes, every ingredient matters! I learned the hard way that skimping on quality makes a huge difference in the final crunch.
- 1 pound fresh green beans, trimmed – look for firm, bright green ones without blemishes
- 2 cups white vinegar – the plain distilled kind gives that classic tang
- 2 cups water – filtered is best if your tap water has strong flavors
- 2 tablespoons pickling salt – don’t substitute table salt, it’ll make the brine cloudy
- 4 cloves garlic, peeled – fresh is key here, no powder!
- 2 teaspoons dill seeds – these pack more flavor than dried dill weed
- 1 teaspoon black peppercorns – whole ones for the best aroma
- 1/2 teaspoon red pepper flakes – optional, but adds such a nice kick
See? Nothing fancy, just good quality basics that work magic together. Now let’s get those jars ready!
Equipment You Need for Classic Dilly Beans
Don’t stress – you probably have most of this already in your kitchen! Here’s what you’ll need to whip up these addictive pickled beans:
- 2 pint-sized jars with lids (mason jars work perfectly)
- Medium saucepan for boiling the brine
- Measuring cups and spoons – gotta get those ratios just right
- Sharp knife for trimming the beans
- Cutting board – my trusty old wooden one does the trick
That’s it! No fancy gadgets required – just simple tools for big flavor.
How to Make Classic Dilly Beans
Okay, let’s get to the fun part – turning these simple ingredients into your new favorite snack! I’ve made this recipe dozens of times, and trust me, once you get the hang of it, you’ll be whipping up jars of Classic Dilly Beans like a pro.
Prep the Green Beans
First things first – wash those green beans thoroughly under cold water. I like to line them up on my cutting board and trim off the stem ends all at once (so satisfying!). Cut them to fit your jars – usually about 4 inches long works perfectly for pint jars. No need to be exact, but you want them standing upright nicely when you pack them in.
Make the Brine
Now for the magic liquid! Combine the vinegar, water, and pickling salt in your saucepan. Get this bubbling away over medium-high heat – you’ll know it’s ready when you see those first big bubbles breaking the surface. Don’t leave it unattended though – vinegar boils faster than water and can surprise you!
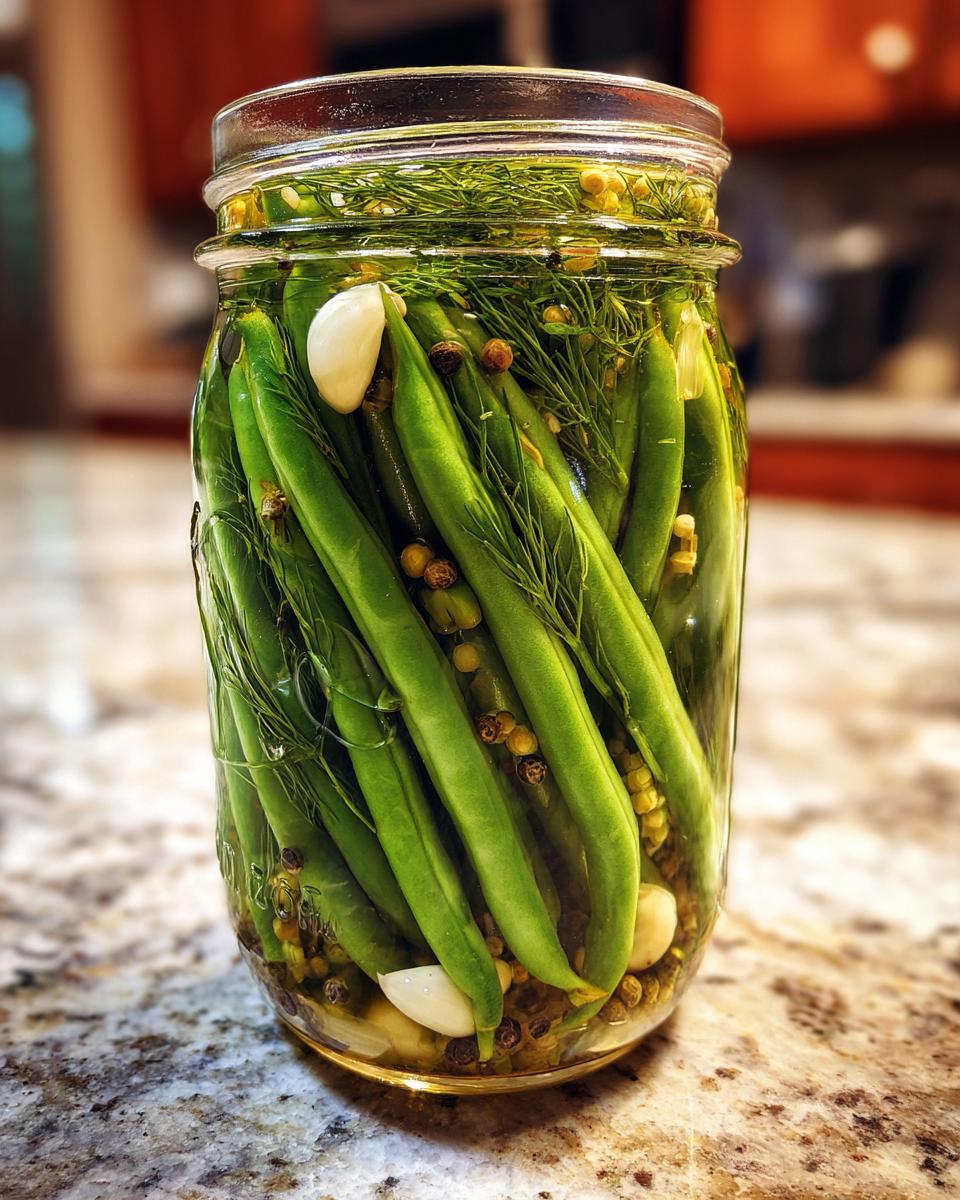
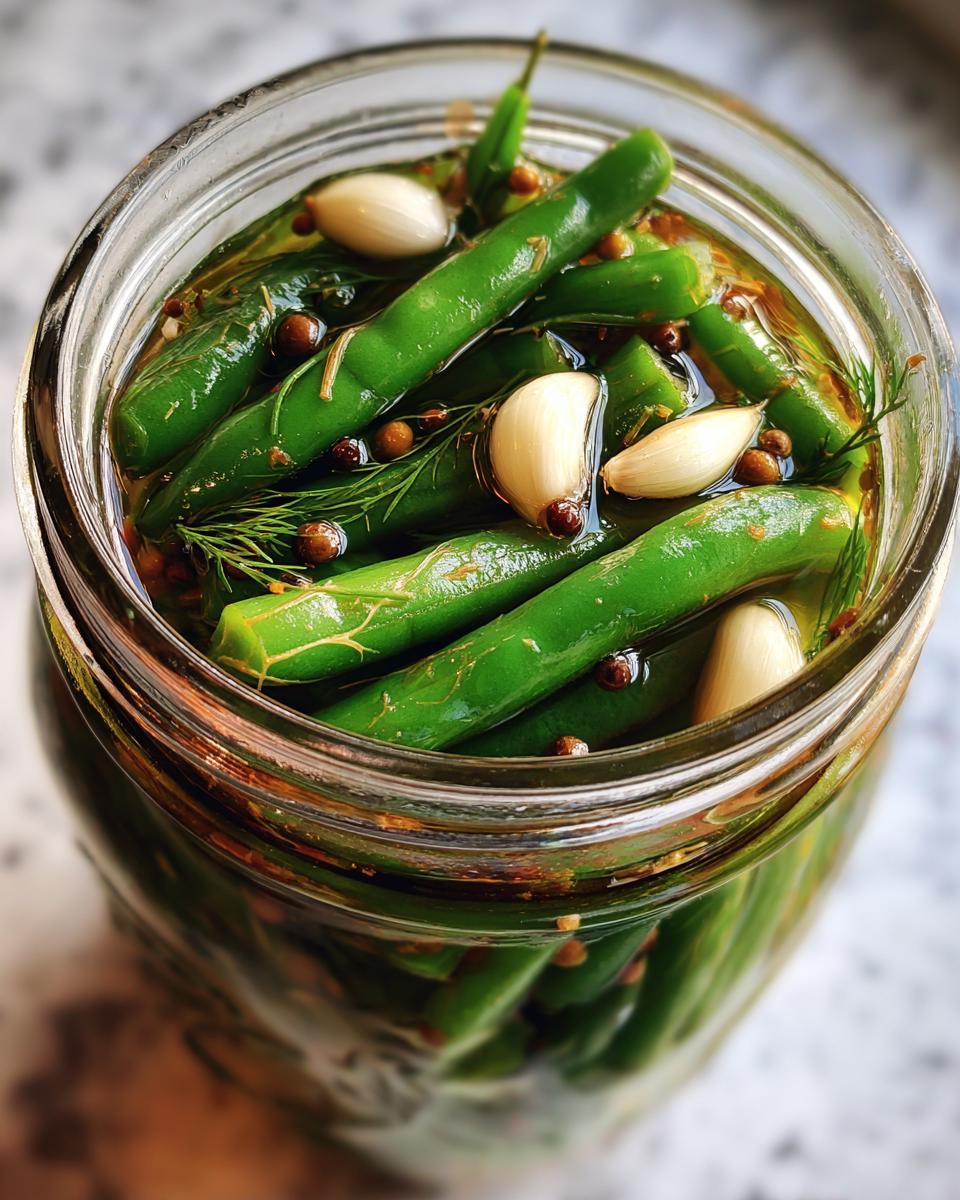
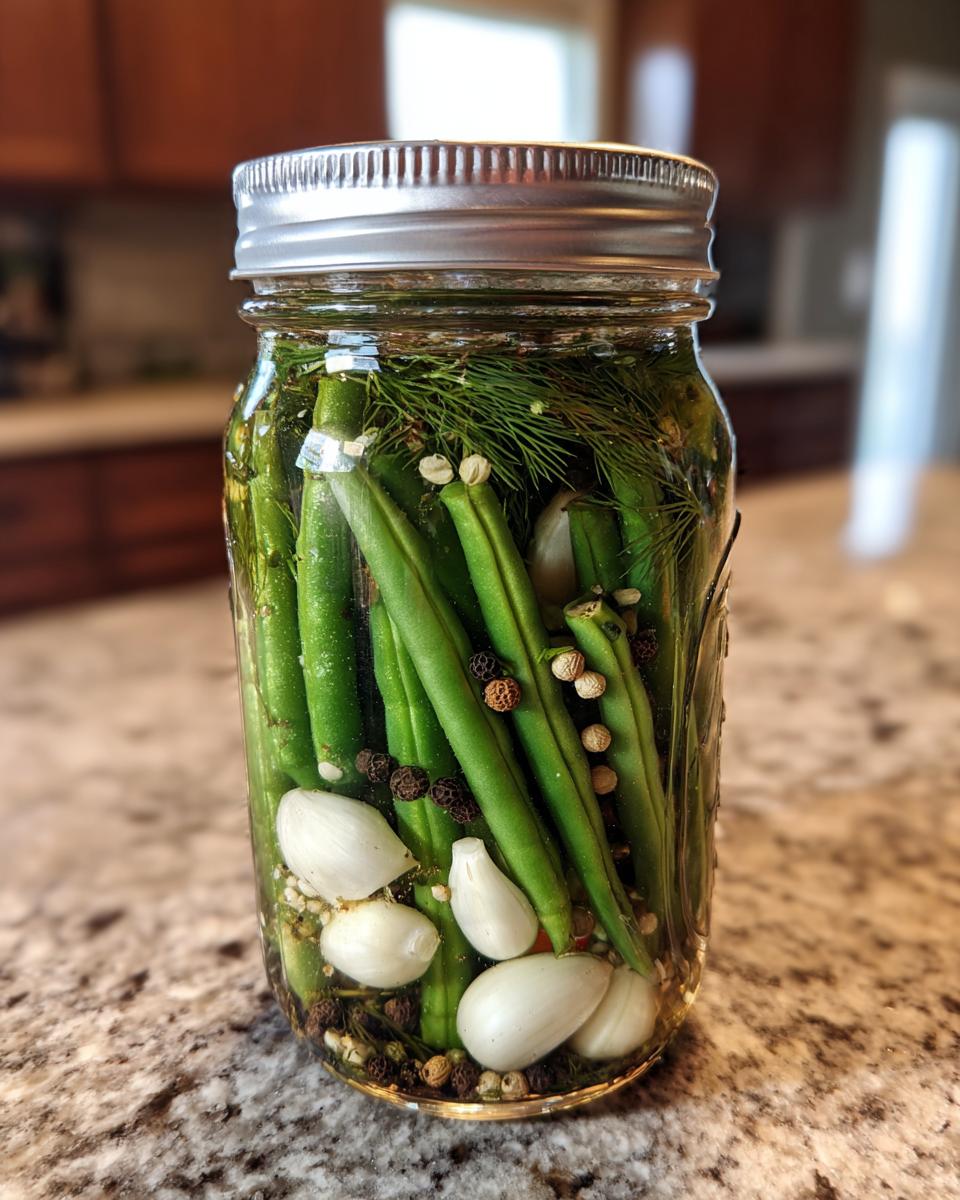
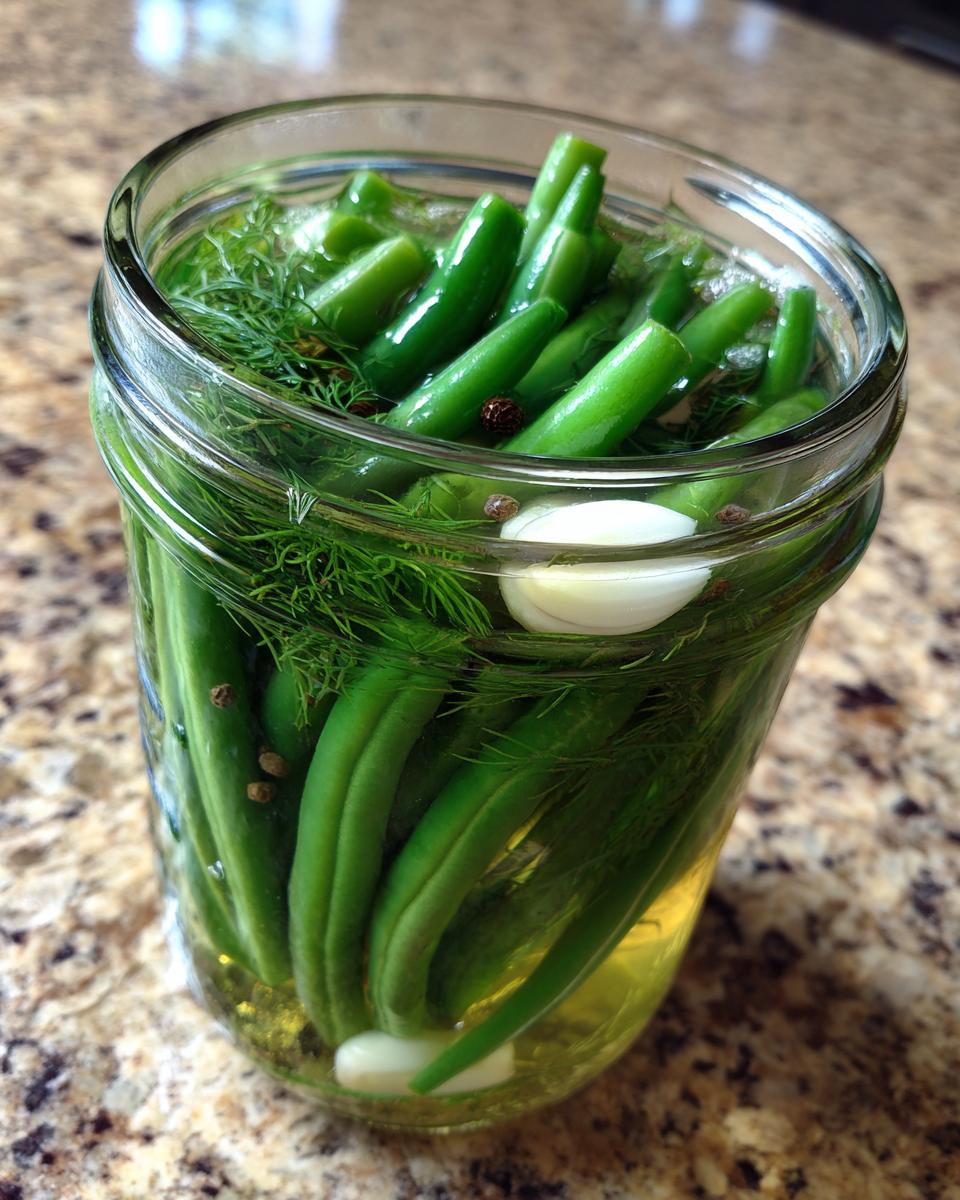
Jar and Refrigerate
Time to assemble! Pack your clean jars tightly with green beans, garlic cloves, dill seeds, peppercorns and (if using) red pepper flakes. Carefully pour the hot brine over everything, leaving about ½ inch of space at the top. Seal the jars tight and let them cool on the counter before moving to the fridge. Here’s the hardest part – wait at least 48 hours before digging in! I know it’s tempting, but trust me, those two days make all the difference in flavor.
Tips for Perfect Classic Dilly Beans
After making batch after batch of these beauties, I’ve picked up some tricks that’ll take your Classic Dilly Beans from good to “oh-my-goodness-I-can’t-stop-eating-these” amazing:
- Fresh is best – bend your green beans before buying; they should snap crisply, not bend limply
- Let them steep – resist opening the jars for at least 2 days (the flavors keep developing for weeks!)
- Taste test the brine before pouring – it should make your lips pucker nicely
- Double the garlic if you’re a garlic lover (I always do!)
- Label your jars with the date – not that they’ll last long enough to worry about!
These little touches make all the difference in creating pickle perfection!
Variations for Classic Dilly Beans
Once you’ve mastered the basic Classic Dilly Beans recipe, have fun playing with these tasty twists! My favorite variation adds 1 teaspoon mustard seeds for extra zing – they pop with flavor in every bite. If you’re feeling adventurous, try swapping half the white vinegar for apple cider vinegar for a slightly sweeter tang. I’ve even thrown in some sliced jalapeños when I’m craving serious heat!
The beauty of homemade pickles? You get to make them exactly how you like them. Just promise me you’ll try the original version first – it’s absolute perfection.
Serving and Storing Classic Dilly Beans
Oh, the possibilities with these tangy gems! My favorite way to serve Classic Dilly Beans is straight from the jar – cold and crisp right out of the fridge. They’re perfect alongside sandwiches (try them with grilled cheese – heaven!) or chopped up in potato salad for extra crunch. At parties, I arrange them in a pretty bowl with olives and pickled onions – they disappear every time!
Store your jars in the fridge where they’ll keep beautifully for up to 2 months – if they last that long! The flavor actually gets better after about a week as the beans soak up all that garlicky, dilly goodness. Just make sure to keep them refrigerated and use clean utensils when serving to prevent contamination. Trust me, you’ll find excuses to snack on these daily!
Classic Dilly Beans Nutritional Information
Now, I’m no nutritionist, but I can tell you these Classic Dilly Beans are about as guilt-free as snacking gets! The exact numbers will vary slightly depending on your ingredients, but with all those fresh veggies and zero added oils or sugars, you’re looking at a crunchy, low-calorie treat packed with flavor.
Frequently Asked Questions
How long do Classic Dilly Beans last in the fridge?
These pickled beauties will stay crisp and delicious for up to 2 months when stored properly in the refrigerator. But let’s be real – they rarely last that long in my house! The flavors actually improve after about a week as the beans soak up all that garlicky goodness.
Can I make them less spicy?
Absolutely! The red pepper flakes are totally optional. For super mild dilly beans, just leave them out entirely. If you want just a hint of warmth, reduce to 1/4 teaspoon. Remember – you can always add more spice next time, but you can’t take it out once it’s in there!
What if I don’t have dill seeds?
While dill seeds give that classic flavor, you can substitute 1 tablespoon of fresh dill weed in a pinch. The taste will be slightly different (more herbal than punchy), but still delicious. Just pack the fresh dill right in with the beans before adding the brine.
Can I use frozen green beans?
I wouldn’t recommend it, friend. Frozen beans just don’t have that perfect crisp texture we’re after. Stick with fresh, firm green beans – their natural crunch makes all the difference in these refrigerator pickles!
Why is my brine cloudy?
This usually happens if you used table salt instead of pickling salt. Don’t worry – your dilly beans are still perfectly safe to eat! For crystal clear brine next time, be sure to use pure pickling salt without anti-caking agents.
Share Your Classic Dilly Beans Experience
I’d love to hear how your Classic Dilly Beans turned out! Did you add extra garlic like I do? Find a new favorite variation? Leave a comment below – your tips might inspire someone else’s pickle adventures! You can also find more inspiration on our Pinterest page.
Print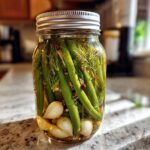
Amazing 5-Star Classic Dilly Beans Recipe You’ll Crave
- Prep Time: 15 mins
- Cook Time: 5 mins
- Total Time: 20 mins plus pickling time
- Yield: 2 pints 1x
- Category: Side Dish
- Method: Pickling
- Cuisine: American
- Diet: Vegetarian
Description
Crunchy green beans pickled with dill and garlic for a tangy, refreshing snack.
Ingredients
- 1 pound fresh green beans, trimmed
- 2 cups white vinegar
- 2 cups water
- 2 tablespoons pickling salt
- 4 cloves garlic, peeled
- 2 teaspoons dill seeds
- 1 teaspoon black peppercorns
- 1/2 teaspoon red pepper flakes (optional)
Instructions
- Wash and trim the green beans to fit your jars.
- Combine vinegar, water, and salt in a pot. Bring to a boil.
- Pack green beans, garlic, dill seeds, peppercorns, and red pepper flakes into sterilized jars.
- Pour the hot brine over the beans, leaving 1/2 inch headspace.
- Seal the jars and refrigerate for at least 48 hours before eating.
- Store in the fridge for up to 2 months.
Notes
- Use fresh, firm green beans for best texture.
- Adjust red pepper flakes to control spiciness.
- Let the beans pickle for at least 2 days for full flavor.
Nutrition
- Serving Size: 1/4 cup
- Calories: 15
- Sugar: 1g
- Sodium: 240mg
- Fat: 0g
- Saturated Fat: 0g
- Unsaturated Fat: 0g
- Trans Fat: 0g
- Carbohydrates: 3g
- Fiber: 1g
- Protein: 1g
- Cholesterol: 0mg